Learning Code with RemNote
So a few months ago I actually posted a video about how I’ve been using Anki to learn coding and programming with flashcards.
Not long after I released that video, I discovered RemNote, a notetaking application, similar to Roam Research that lets you do 3 key things:
Breakdown your ideas into hierarchical bullet points
Create a network of notes and ideas with backlinks and references
Memorise notes and concepts you want to with a built-in flashcard manager
It took me a bit of time to get used to the structure of RemNote, but now that I’m used to it, I am starting to see the tremendous power of this application.
In this post I'll walkthrough how I’ve currently got RemNote structured to learn programming and briefly discuss why I think it has benefits over using Anki.
Setup in RemNote
Below you can see a preview of the “parent page” for my programming notes. I have found it beneficial to essentially categorise my snippets or notes, into their own respective languages, or interfaces.
As you can see in the below example, the main languages I’ve been interacting with at work are Git, SQL, Python & UNIX.
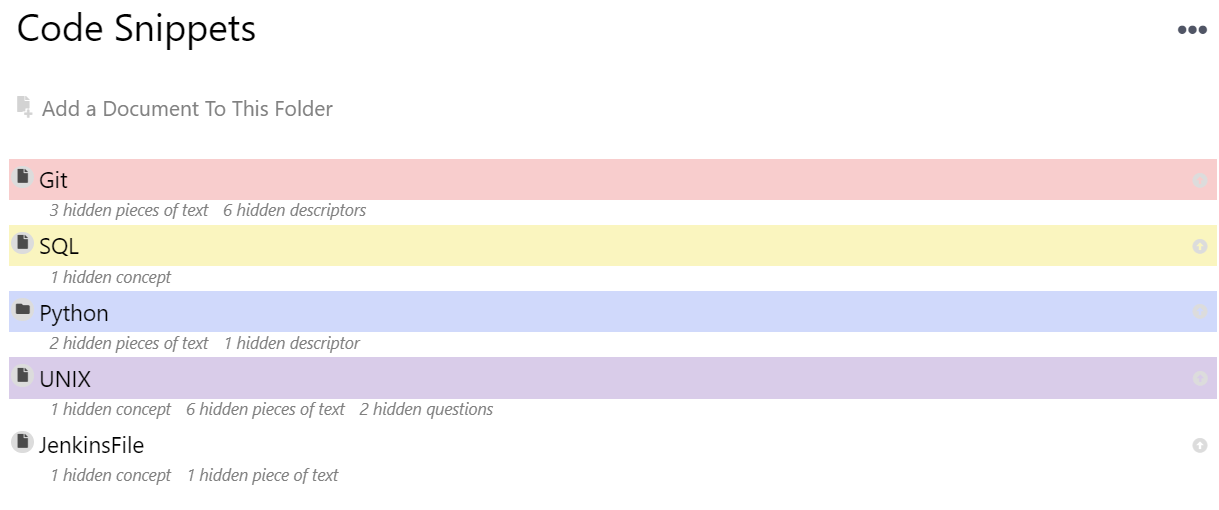
Each of these categories, I have tagged them as documents themselves. I’ve basically just created a folder like structure within RemNote.
Let’s take a look at a particular page - Git

Within my Git page , I’ve further segmented the structure into topics that seem to come up. For example cloning, branching and configuration. This is just so that if I ever want to come and review my notes on Git, I can quickly parse the page and review the topic I’m interested in.
Making Flashcards
So from above, you may be wondering how do you create the flashcards?
The beauty of RemNote is that you essentially do it in the flow of your notetaking. Let’s take a look at the first note under Cloning as an example.

RemNote automatically creates flashcards when you write ‘::’, and it takes the text left of the colons as the front-side of the flashcard, and the text right of the colons as the back-side of the flashcard. See a more detailed explanation of this with RemNote’s tutorials.
Once you’ve taken your notes, you can evaluate how your flashcards are looking, by clicking on the card icon in the bottom left toolbar. See from the picture below that when you do this, it will show you exactly how your flashcard will look, and you can even adjust what type of flashcard you want (forward only, forward and backward, etc.). How cool is that!

Why is this better than Anki?
Anki, is undoubtedly one of the best spaced repetition system, flashcard managers out there. I have used it for almost 10 years, and still highly value it.
However, the reason I’m currently loving RemNote, is it gives me the power to add context around my flashcards.
Education and learning isn’t solely about memorising facts, snippets and concepts. It is also crucially about making new ideas and connections between interrelated pieces of information. And I believe this is where RemNote comes in strong.
Let’s continue with my Git Cloning note as an example. As we saw before, it was just a flashcard on its own, a question, and an answer.
But I can in fact extend this note further, by adding contextual information about why this note is important, and maybe examples where I have used it…

So above I’ve added just that. I now have context as to why I might want to rename a Github Repo when cloning it, and I have an example of how to do it. If I had this in Anki, I would only have just the question and answer, and I don’t necessarily have enough contextual information to know when and why I should yield the power of this code snippet.
Follow Me!
Before you go any further, if you’re enjoying my content, please consider subscribing to both my Newsletter, and my YouTube channel for more!


How to split finances with your partner. I share my thoughts on some common approaches to splitting finances with your partner, and what I view as pros and cons to these methods. I also share what I currently do.